More Photosynth action

After some success at creating a Photosynth of upstairs area, I decided to try my hand and doing figures again. With the newly installed flooring downstairs, I think I’d created the perfect backdrop for good synthing potential. First up, a quick reminder of what Photosynth is. It was created out of the research done at Microsoft Research as a method to use information from photos to generate a virtual environment. In essence, it is a tool to facilitate “photo tourism.” From photosynth.net:

What is Photosynth?

Photosynth creates an amazing new experience with nothing more than a bunch of photos. Creating a synth allows you to share the places and things you love using the cinematic quality of a movie, the control of a video game, and the mind-blowing detail of the real world.

How Does it Work?

In simple terms, Photosynth allows you to take a bunch of photos of the same scene or object and automagically stitch them all together into one big interactive 3D viewing experience that you can share with anyone on the web.

Photosynth is a potent mixture of two independent breakthroughs: the ability to reconstruct the scene or object from a bunch of flat photographs, and the technology to bring that experience to virtually anyone over the Internet.

Using techniques from the field of computer vision, Photosynth examines images for similarities to each other and uses that information to estimate the shape of the subject and the vantage point each photo was taken from. With this information, we recreate the space and use it as a canvas to display and navigate through the photos.

Providing that experience requires viewing a LOT of data though—much more than you generally get at any one time by surfing someone’s photo album on the web. That’s where our Seadragon™ technology comes in: delivering just the pixels you need, exactly when you need them. It allows you to browse through dozens of 5, 10, or 100(!) megapixel photos effortlessly, without fiddling with a bunch of thumbnails and waiting around for everything to load.

We deliver this immersive viewing experience to users on multiple operating systems by tapping into the power of Silverlight, Microsoft’s rich web application technology.

Without further ado, a few synths I’d recently created. First up, the synth I’d done last week showing off my upstairs area. There’s quite a bit to explore here, from the keyboard on my desk to the shelf of manga and DVDs. Unfortunately, I didn’t do too much in terms of closeups with the figure displays, something I may revisit in the future. Click the image to view the synth!

room

My first attempt tonight featured working with a recent acquisition, 1/6 scale Yoko Littner by Kotobukiya. This is the first time I tried using the floor as a background and am very encouraged by the results. In addition to the floor, I also grabbed a wood cutting board to provide more background complexity…

yoko

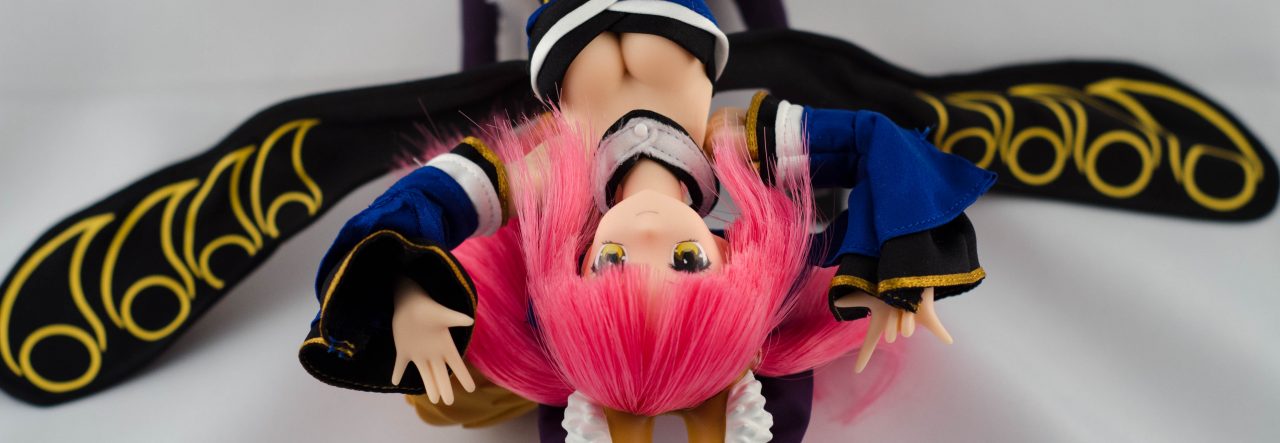
My second attempt tonight featured Dollfie Rin. I achieved slightly better results with this synth (100% synthy) since I didn’t try to do any odd-angled close ups. I will probably revisit this one later to do some more close up detail shots for a better “tour.”

rin

In addition to these, I had done quite a few others in the past (with varying success). Check the rest of them out here. I’ll continue to do other figures and may expand on to doing some scenes. Such a cool little tool, isn’t it?

Otacool!

Recently, Danny had partnered up with Japanese figure maker Kotobukiya to gather information about otaku from around the world. This information, along with pictures of the various otaku rooms would be published later this year in a book called OTACOOL – Worldwide Otaku Rooms. To kick things off, he’d asked the winning entrants from his “My Room” contest to upload higher resolution photos to his new figure.fm site. From the initial sets, images would be chosen for the cover of the book. Presently, here’s what the cover for the book looks like:

821a15941ba1e752b142be40c753d035

If it stays that way, then I’ll have made the cover! The top left image is a shot of the lounge, complete with cat! As cool as it is, I would have preferred that they used a different image, I’m particularly fond of the nigh time shots, which show the display cases all lit up. It seems that Danny is partial to those pictures too, as one of them wound up being used in the banner for the Otacool portal.

Continue reading “Otacool!”

My computer area (AKA Otaku Lounge pt. 2)

Due to the compliments I received from the last post and all the questions asking about other areas in my house, I was encouraged to clean up the computer area that is next to my otaku lounge. After sorting away some papers, tidying up the desk, and removing the junk from the floor, the area was finally photo worthy.

IMG_3067

From this angle, you can see how the upstairs area is completely open. This was actually the thing that sold me on this house and I’d always envisioned making this area my little haven. Typically, if I’m entertaining guests, they’ll be downstairs as that is where the TV, XBOX, and kitchen are. Occasionally, I’ll bring people upstairs just to give them the tour. Sadly, most of the people that come over aren’t terribly otaku, so most of the decor is lost on them…

IMG_3072IMG_3100

Here’s a better view of the desk area itself. Not too much here to talk about except for the couple of interesting decorative items I have. Above the desk are three posters from the MegaTokyo webcomic (all available from the Megagear store): Polesitting, Kimiko, and Ph34r teh Cut3 Ones. I also have the .N1T3Z poster, though that is hanging on the wall of my cubicle at work. I also keep a shelf of Figmas above the monitor (shelf is a LJUSDAL from IKEA) and they’re lit by a set of LACK LED pendants.

Continue reading “My computer area (AKA Otaku Lounge pt. 2)”

Completing my otaku lounge

Since Danny’s “Your Room” contest, I decided to make a couple of improvements to my upstairs loft area. A couple of trips to IKEA later, and I’m proud to show off the final product!

IMG_3053

The changes are fairly subtle, but I decided to do away with the coffee table in the middle and replace it with a smaller side table. The chair and footstool came from IKEA’s clearance section (both were floor display models and in excellent condition) as did the reading lamp. I think the entire area only has two furnishings that aren’t from IKEA… the lamp in the far corner and the DVD storage rack.

IMG_3062 IMG_3063 IMG_3066

I particularly like the side table, as it gives me a place to put things like books and other trinkets. The Altec Lansing Zune Dock and Zune are to be permanent fixtures on the table and will allow me to have music while sitting and relaxing. The wireless sync ability will allow me to easily download new music to the player. I’ve also decided to keep my DS charger here.

Taking stock, here’s what has wound up in this area over the past year:

I’m quite happy with the results. At some point, I may consider changing out the flooring and replacing the carpet with a hardwood floor. Tatami panels might be interesting and fit with the theme. For now, however, I’m content with the way it is.

IMG_3099